Your cart is currently empty!

The squeaky wheel gets the oil.
A Wednesday evening at the dojo, a friend of mine, Steve Rubio, handed me two sheets of graph paper, it was a table that he’d like me to build. The dojo was quite busy so I placed them on my desk, and we both got busy teaching. (Steve -Sensei, has been teaching Wednesday nights at the Kingstowne dojo for many years). Later, I took a peak, at the drawing it was well thought out with great detail. When someone puts this much effort into drawing a design, it gets my attention. In this case it was not the squeaking wheel, but the intriguing concept of Rubio’s table, which got my design gears moving.
I was impressed by Steve’s drawings, but at that time, I didn’t have the mental capacity to process a new design/project. As I was very busy finalizing another build, which had some design challenges of its own, but eventually I delivered it, then I took a serious look at Steves design.
His design,
Essentially he wanted a solid table base, that could support a tabletop with 3 separate sections. The top(s) would not be attached to the base and could be placed in different configurations. The idea was to sandwich cross pieces under the top which then sat on the base. He had defined each block on the grafting paper as a 4×4 so his idea was to use either 2×4‘s or 2×6’s for the build.


When someone puts this much effort into drawing a design, it gets my attention
My modifications…
My major changes was going with 3/4 inch material, and designing a support system for the table top, I was worried about the top flipping if someone put to much weight on one side. Especially, when all 3 leaves where in place. So, I designed an expandable support that would pull out when all the leaves where being used. I also pushed back the bottom shelf on the ends for extra leg-space, when in it’s smaller 2 leaf configuration.
This is what I presented:


Step 1, Make the legs.
Steves had a “L” shape leg design. To do that with plywood meant 45 degrees angle cuts, it’s simple just tilt the blade on the table saw 45 degrees set the fence to the desired width, and rip the board. The difficult part is the glue up, the angles just slide apart. To solve, I use a Festool Domino to place wooden tenons inside the joint. It accomplishes 2 jobs, the joint will have more holding power, and it keeps the joint lined up (when applying clamps during glue up they keep the joint from slipping too!) . The end result is the outside edge of the leg will not show any interior layers, and is justifies my purchase of said tool.


Step 2, Make the bottom shelf.
Sometimes you take the wood to the tool, other times you take the tool to the wood. When Crosscutting big sheets of plywood, it’s easier/safer to use a track saw (instead of pushing the entire sheet through a table saw). The bottom shelf is made from 3 sections, add in some tenons, then glue, and clamp.


The bottom shelf will set inside the legs so the top apron must be cut exactly. To get the most accurate cut I placed the bottom shelf inside the legs then cut the aprons to match.


After cutting the aprons, I used the domino to add tenons. Then it was time for the glue up, all four sides, and the bottom shelf at the same time. The open assembly time for the glue is 3-5 minutes. Meaning I needed to hustle. I ran the entire assembly ”dry”; then pulled it apart, and repeated the process this time for real, adding glue. The Bessey clamps are worth every overpriced dime, and everything went as planned.
To guarantee that the bottom shelf is exactly where it should be (10 inches from floor) I used “sacrificial boards” – think stilts holding up the shelf until the glue sets. It’s the little things in life, right.


Although not in the plans, I decided to inclose the bottom section just below the apron. I needed something to do while as the glue dried anyway, and I had some scrap 1/4 inch ply that would fit, with some help from my ban saw.

After nailing in the 1/4 plywood, I installed the cross sections (not pictured). Then with the unit upside down I raised the blade to 1 inch and ran repeated cuts for the notches. This is something I wouldn’t consider on a contractor table saw (to small), I love my Powermatic 66 cabinet saw and it was perfect for this task, the addition of the shop made out-feed table also came in handy.


A chisel and a sanding block made quick work. then I added the table top supports.
The sun has set, and I’m happy with my progress. So I called it a day and went up to the house. With a lot to get more done in the morning.

During the night I had an idea about keepIng the expansion aprons from tilting up, I put a tenon in the movable support, that would engage into the cross section when pulled to its maximum length. Simple and effective.


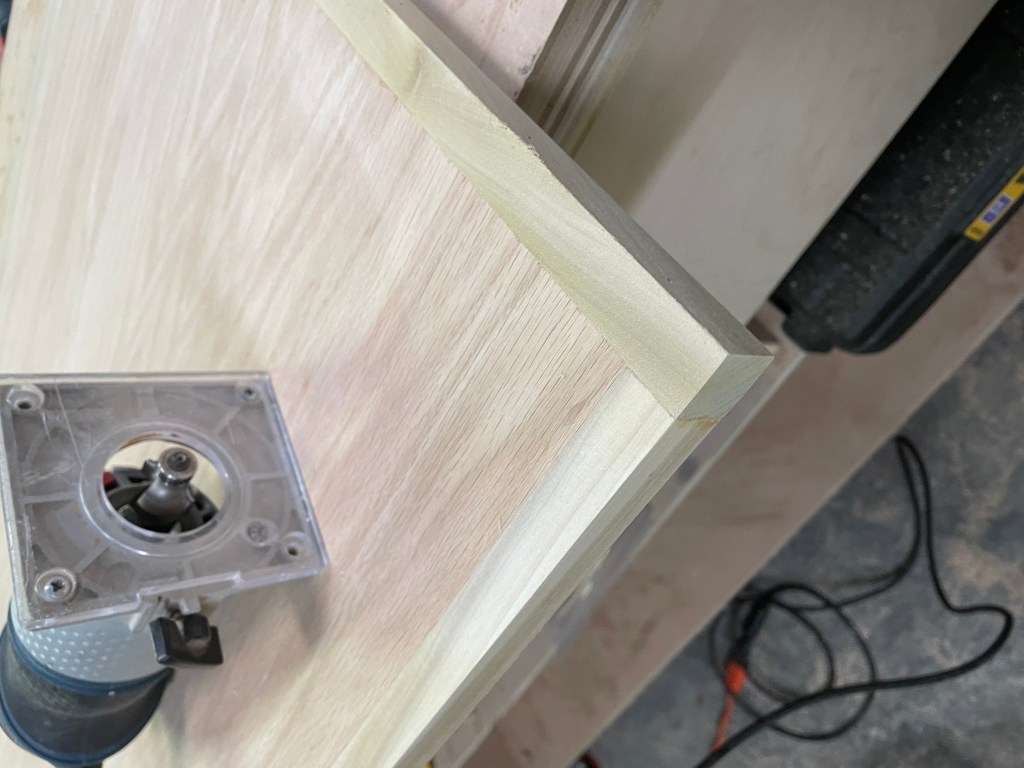
Using poplar to trim base and table top(s) my new 23 gauge nail gun worked spectacularly.


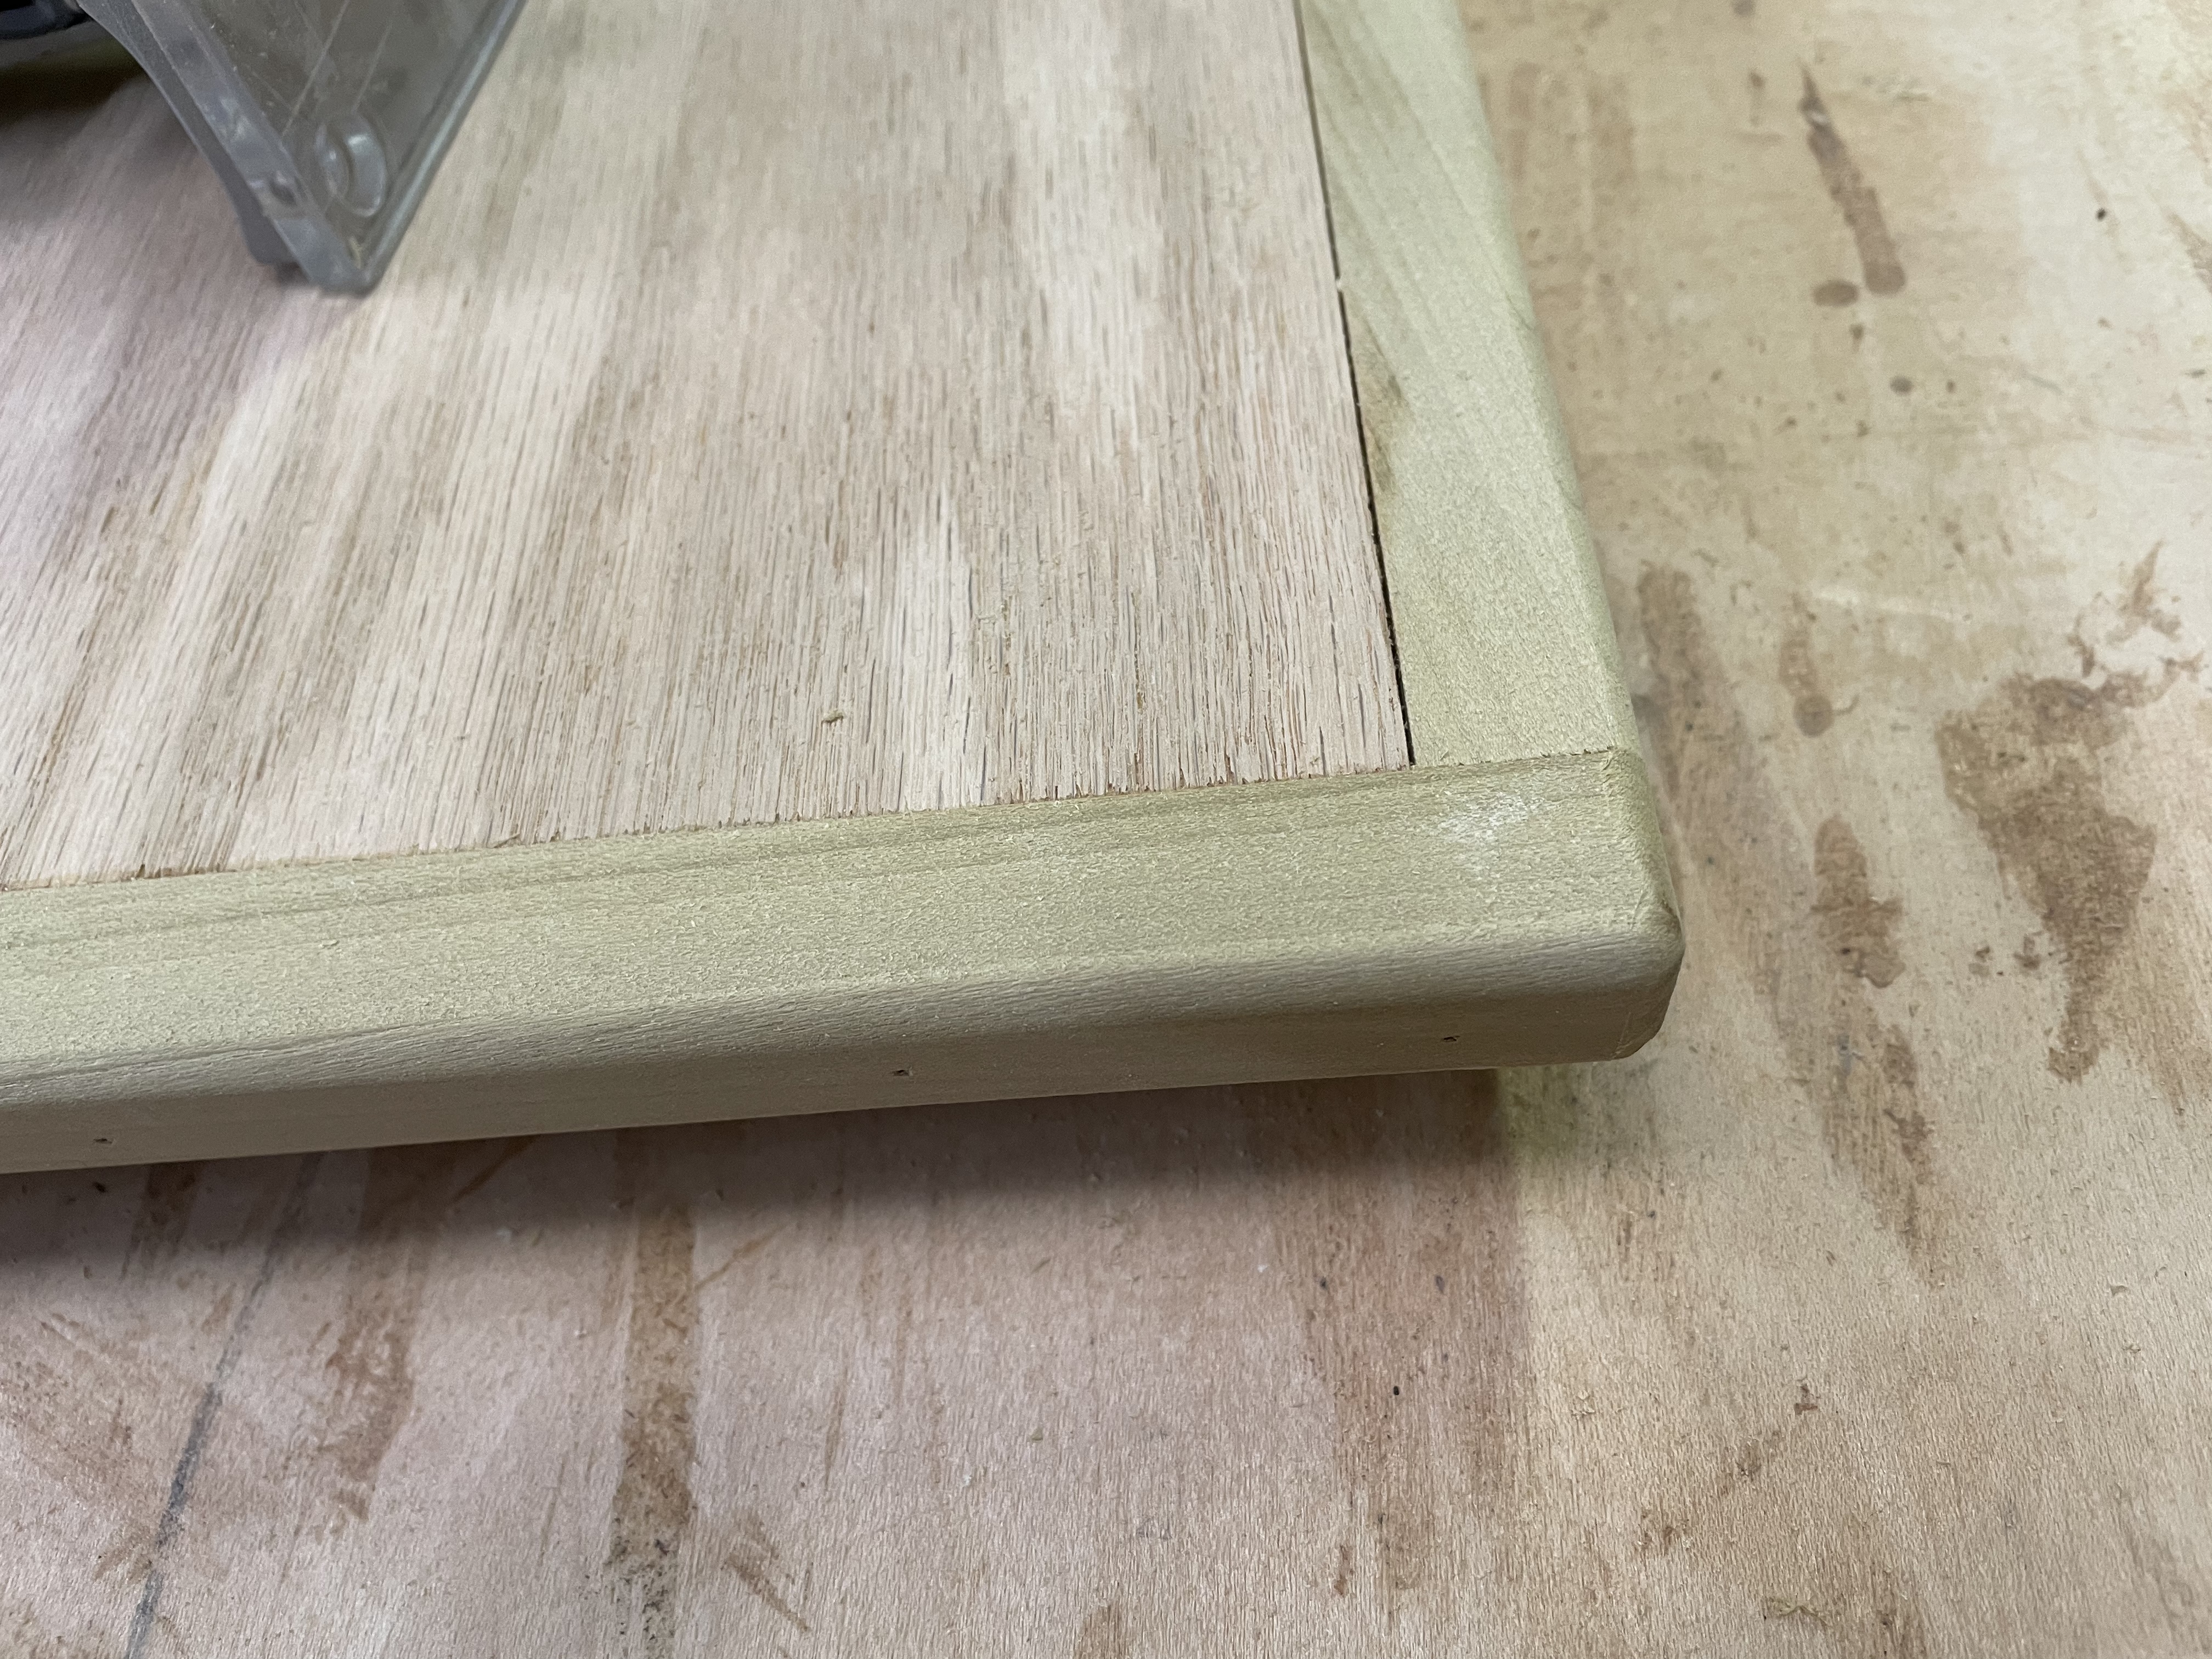
I put on my favorite router bit to round over the edges, pulled out the Festool minivac and Orbital Sander, put it all together and just like that- Done!

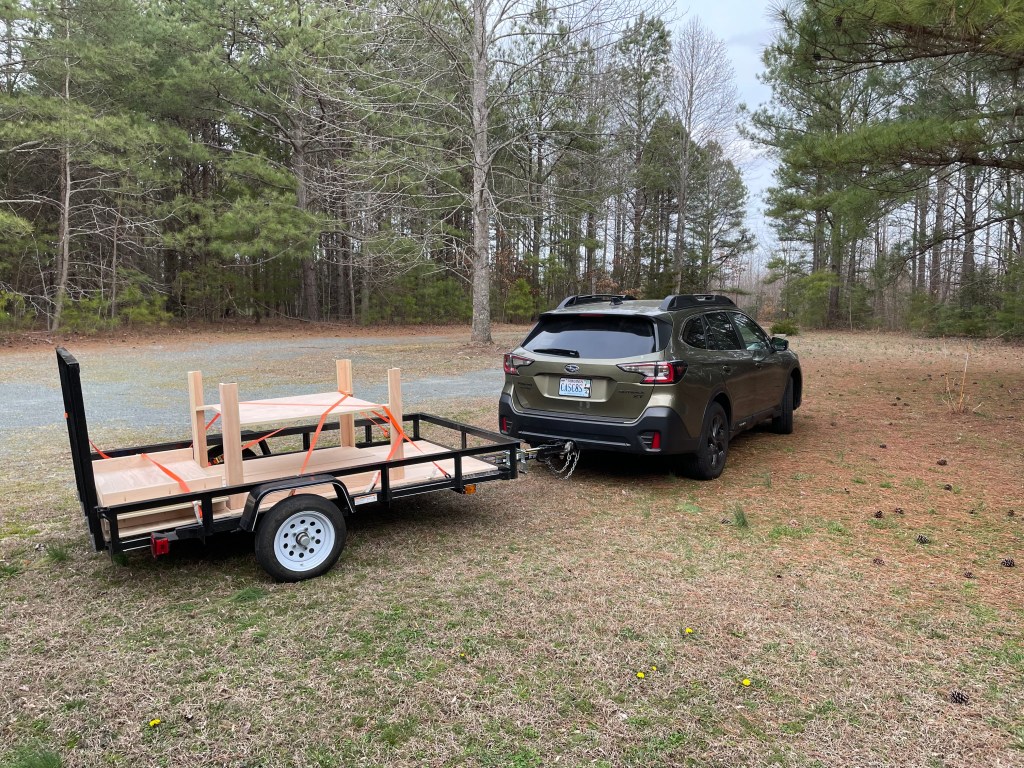
All packed up lets go home. (Check out the map to see where my shop is)
After it arrived home in Alexandria I added the finish here I chose Rubio Monocoat. Its a 2 part oil that is used on hardwood floors and furniture, and after 48 hour cure it provides great protection on fine furniture. Plus the desk is for Steve Rubio…


All delivered! Steve was/is very happy with it saying ”This is exactly it” The top fits his gaming mats perfectly and the miniatures can also be stored under the table.


I had a blast on this build it was very challenging but very rewarding. Thanks goes out to Steve for working closely on this design and allowing me to modify as needed. Like this build? Leave a comment and subscribe to this blog.


Processing…
Success! You're on the list.
Whoops! There was an error and we couldn't process your subscription. Please reload the page and try again.
Leave a Reply to Danny J Cancel reply